
Buttery salmon, plump shrimp, and sweet roasted onions on a single pan, and the only thing you wash afterward is a fork.
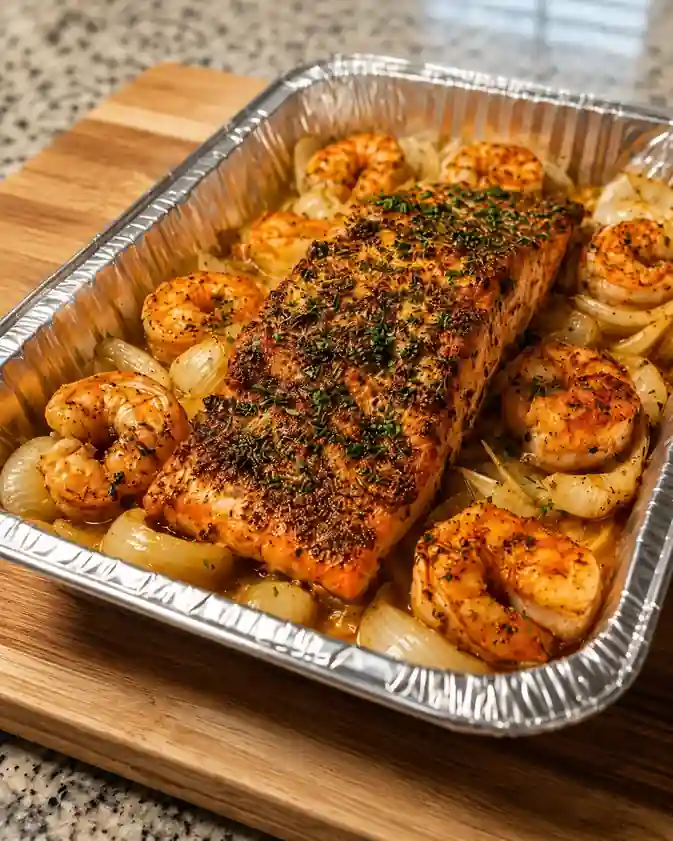
There’s a specific moment with this dinner that I look forward to every single time: you pull the pan out of the oven, the foil is still crackling, and the whole kitchen smells like paprika and browned butter. The salmon has that dark, spiced crust on top. The shrimp have curled up pink and glossy. The onions underneath have gone soft and sweet and are sitting in a puddle of buttery pan juices that you will absolutely want to spoon over everything.
I started making this on a Tuesday when I had a salmon fillet thawing and a bag of shrimp in the freezer and zero interest in dirtying more than one pan. It worked so well that it’s now in permanent rotation at my house. My husband calls it “the fancy one,” which always makes me laugh, because it takes ten minutes of actual work.
Here’s what makes this version different from most tray bakes floating around online: the onions go down first, in a single layer, and they act like a rack. The salmon and shrimp sit slightly lifted out of the liquid instead of steaming in it, so you get roasted edges instead of a soggy pan. And the seasoning goes on after the butter, not before, so it sticks and toasts into a real crust instead of sliding off into the juices.
Why you’ll love this recipe
- One pan, thirty minutes — Foil-lined, oven-baked, and cleanup is basically throwing away the foil.
- Two proteins, zero timing stress — Salmon and shrimp finish in the same window, so nothing gets left behind.
- Restaurant-looking, weeknight-easy — It comes out of the oven looking like you fussed. You didn’t.
- Pantry seasoning only — Paprika, garlic powder, onion powder, parsley. Nothing you have to go buy.
- Naturally low-carb and family-friendly — Add rice or bread on the side and everyone’s happy.
Ingredients you’ll need
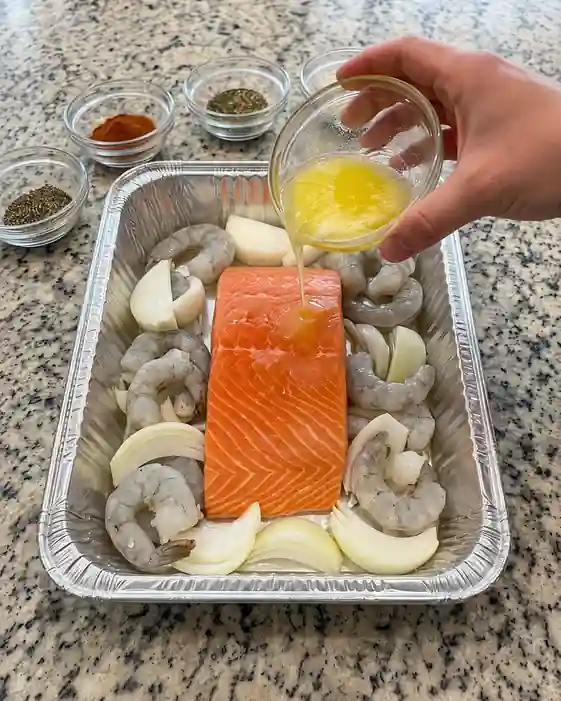
A short list, but each one is doing real work here.
- Salmon fillet (one large, about 1.5 lb) — Ask for a center-cut piece if you can. It’s an even thickness, so it cooks uniformly instead of drying out at the thin tail end. Skin-on is fine; the skin protects the bottom and peels right off after baking.
- Shrimp, peeled and deveined — Large (26/30) or jumbo hold up best. Smaller shrimp overcook before the salmon is ready. Frozen is perfectly good, just thaw and pat them very dry.
- Onion, cut into wedges — Sweet or yellow. Keep the wedges chunky so they hold their shape and turn sweet and jammy instead of collapsing.
- Olive oil — Handles the higher heat and keeps things from sticking.
- Melted butter — This is the flavor. Butter alone would brown too fast at 400°F, which is exactly why we use both.
- Paprika — Regular sweet paprika for color, or smoked if you want a little campfire warmth. Your call, both are great.
- Garlic powder and onion powder — Powders, not fresh, on purpose. Fresh garlic scorches and turns bitter under a broiler. Powders toast into a crust.
- Dried parsley — In the seasoning blend for color; a little fresh chopped parsley at the end if you have it.
- Salt and black pepper — Season more generously than feels right. Seafood needs it.
- Lemon wedges — Not optional in my kitchen. The squeeze at the table wakes the whole pan up.
How to make baked salmon and shrimp tray bake
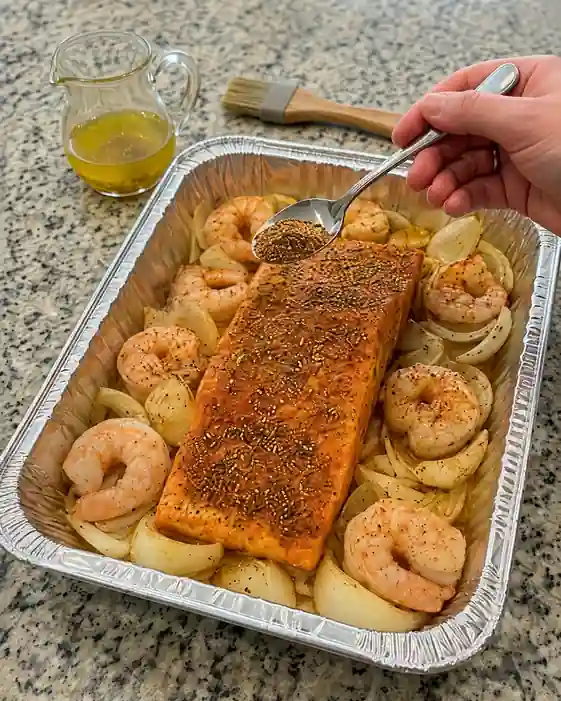
- Heat the oven hot and line the pan. Get it to 400°F and let it fully preheat. Line your baking dish with foil, or use a disposable foil pan like I do. A hot oven is what gives you roasting instead of steaming.
- Mix the seasoning. Stir the paprika, garlic powder, onion powder, dried parsley, salt, and pepper together in a small bowl. Mixing first means it goes on evenly instead of landing in clumps.
- Build the pan. Scatter the onion wedges across the bottom in a single layer, set the salmon right in the center, and tuck the shrimp around it. Give everything a little breathing room. Crowded pans steam.
- Drizzle the oil and butter. Pour the olive oil and melted butter over the salmon, shrimp, and onions. Nudge the pieces around with your fingers so everything glistens.
- Season everything. Sprinkle the blend over the salmon and shrimp, and don’t be shy about the top of the salmon. That’s where the crust forms. The butter underneath will grab it and hold it.
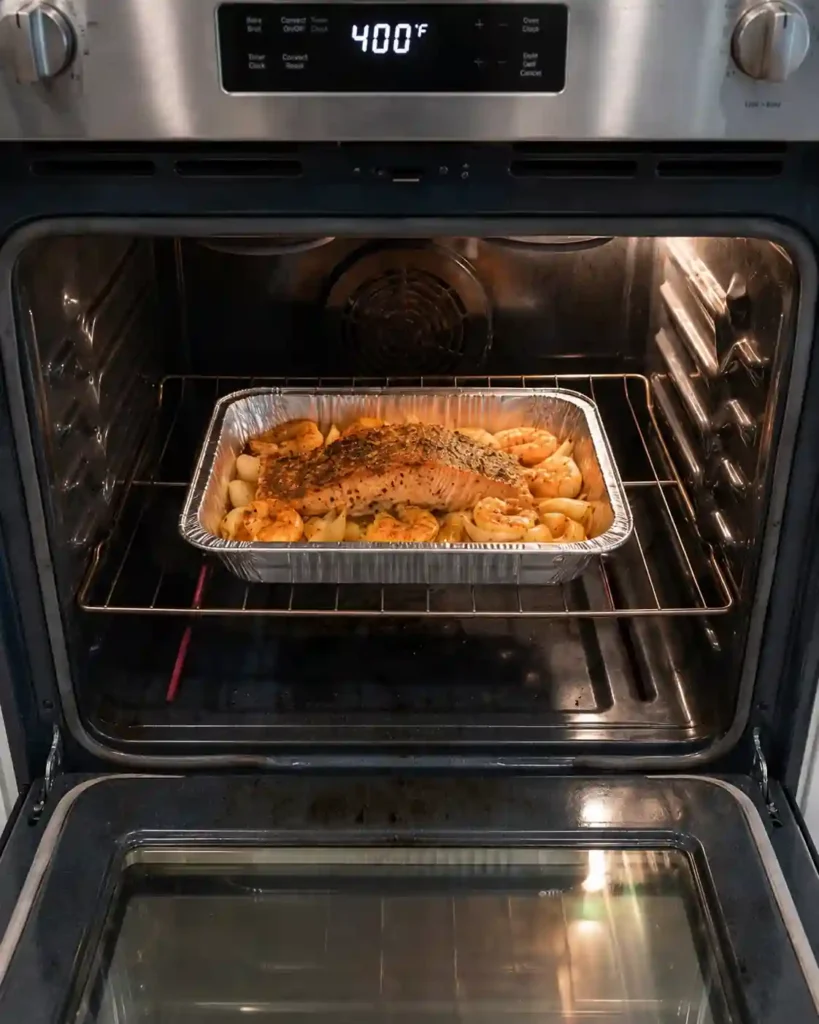
- Bake until the salmon flakes. Uncovered, 18 to 22 minutes. You’re looking for the salmon to flake when you press a fork into the thickest part and the shrimp to be pink and just curled into a loose C. A tight O means they went a minute too far.
- Broil for color. One to two minutes under the broiler, and do not walk away. This is where the top goes deep and toasted and the shrimp pick up those charred edges.
- Rest, then serve. Let it sit two minutes, scatter fresh parsley, and bring the whole pan to the table with lemon wedges. Spoon the pan juices over every plate.
Tips from my kitchen
- Pat the shrimp bone dry. This is the mistake I made for months. Wet shrimp release water, that water pools, and instead of roasted shrimp you get sad boiled ones. Paper towels, press firmly, twice.
- The pro move: pull it at 125°F. An instant-read thermometer in the thickest part of the salmon is the difference between silky and chalky. Carryover heat takes it the rest of the way while it rests.
- Make-ahead shortcut. Mix a triple batch of the seasoning and keep it in a jar. Cut the onions the night before. Then this is a five-minute assembly after work.
- Buy your shrimp frozen. Almost all “fresh” shrimp at the counter was previously frozen and thawed on someone else’s schedule. Frozen means you control the thaw and they’re firmer.
- If your salmon is under an inch thick, check at 15 minutes. Thin fillets are the number one reason people end up with dry salmon in a tray bake.
- Save the pan juices. That buttery, paprika-stained liquid at the bottom is the best sauce in the recipe. Spoon it, or mop it with bread.
Variations
- Cajun style — Swap the seasoning blend for 2 teaspoons of Cajun seasoning and a pinch of cayenne. Bold, smoky, and my personal favorite version.
- Dairy-free — Use all olive oil, or a good plant butter. Bump the paprika slightly to make up for the richness.
- Add vegetables — Asparagus spears or halved cherry tomatoes go in for the last 10 minutes. Broccoli florets or baby potatoes need a 15-minute head start before the seafood joins them.
- Lemon herb — Skip the paprika, use lemon zest, dried dill, and garlic powder instead. Lighter and brighter.
- Protein swaps — Cod, halibut, or a thick tilapia fillet all work. Reduce the bake to 14 to 16 minutes for leaner white fish.
What to serve with baked salmon and shrimp tray bake
- Garlic butter rice — The rice soaks up those pan juices, which is honestly the whole point.
- Crusty bread — For the same reason. Nobody in my house lets that butter go to waste.
- A sharp lemon arugula salad — The peppery bite cuts right through the richness of the salmon.
- Roasted asparagus — Slide it into the same oven on a second pan. Ready at the same moment.
Storage and reheating
Fridge: Store leftovers in an airtight container for up to 2 days. Seafood doesn’t have a long window, and shrimp in particular starts turning rubbery after day two.
Reheating: Cover with foil and warm in a 275°F oven for about 10 minutes, or until just heated through. Low and slow is the only way. The microwave will turn your shrimp into erasers. Honestly, leftover salmon flaked cold over a salad is better than any reheat.
Freezing: I don’t recommend it. Both the salmon and the shrimp were almost certainly frozen once already, and a second freeze wrecks the texture completely. Make what you’ll eat.
Can I use frozen shrimp without thawing them first?
Thaw them. Frozen shrimp release too much water into the pan and you’ll steam the salmon instead of roasting it. A 10-minute soak in cold water thaws them completely, then pat them very dry.
Can I substitute a different fish for the salmon?
Yes. Cod, halibut, and mahi-mahi all work well. They’re leaner than salmon, so drop the bake time to 14 to 16 minutes and be a little more generous with the butter.
How do I keep the salmon from drying out?
Pull it at 125°F in the thickest part, or as soon as it flakes under gentle fork pressure. Salmon goes from perfect to dry in about 90 seconds at 400°F, so start checking at the 16-minute mark.
Can I prep this ahead of time?
You can cut the onions and mix the seasoning up to 3 days ahead. Don’t season the raw seafood in advance though. Salt draws moisture out of shrimp and they’ll bake up watery and soft.

Baked Salmon and Shrimp Tray Bake
Ingredients
Equipment
Method
- Preheat the oven to 400°F and let it come fully to temperature. Line a baking dish with foil for easy cleanup, or use a disposable foil pan.
- In a small bowl, stir together the paprika, garlic powder, onion powder, dried parsley, salt, and black pepper until evenly combined.
- Scatter the onion wedges across the bottom of the pan in a single layer. Set the salmon fillet in the center and tuck the shrimp around it, leaving a little space between pieces so everything roasts instead of steams.
- Drizzle the olive oil and melted butter over the salmon, shrimp, and onions until everything glistens.
- Sprinkle the seasoning blend evenly over the salmon and shrimp, pressing lightly on the salmon so it forms a crust. The butter underneath will hold it in place.
- Bake uncovered for 18 to 22 minutes, until the salmon flakes easily under gentle fork pressure and reaches 125°F in the thickest part, and the shrimp are pink and curled into a loose C shape.
- Broil for 1 to 2 minutes until the top is deeply toasted and the shrimp pick up charred edges. Watch closely because it goes fast.
- Let the pan rest for 2 minutes, scatter with fresh parsley, and serve hot with lemon wedges. Spoon the buttery pan juices over every plate.