
I still remember the first time I made homemade chocolate ice cream. The kitchen was filled with the rich aroma of melting chocolate, and as I stirred the mixture, I could already picture myself enjoying a scoop on a hot summer day. This recipe is special because it takes me back to those carefree moments, sharing sweet treats with family and friends. Making your own ice cream allows you to enjoy a creamy dessert without any artificial flavors or additives. Plus, nothing beats the satisfaction of indulging in a delightful bowl of homemade chocolate ice cream. Let’s dive into how you can create this comforting dessert in your own kitchen!
why make this recipe
Homemade chocolate ice cream is simple and rewarding. It gives you control over the ingredients, ensuring you’re using the highest quality chocolate and cream. Making your own ice cream also brings a fun kitchen activity that can involve family or friends. Plus, you’ll be able to customize it to your taste! Whether you like it plain or with mix-ins, you’ll find more joy in each scoop knowing you made it from scratch.
how to make Homemade Chocolate Ice Cream
Ingredients
- 2 cups heavy cream
- 1 cup whole milk
- 3/4 cup granulated sugar
- 1/2 cup unsweetened cocoa powder
- 4 oz bittersweet chocolate, melted
- 1 tsp vanilla extract
- A pinch of salt
Directions
- In a large bowl, whisk together the heavy cream, whole milk, sugar, cocoa powder, melted chocolate, vanilla extract, and salt until everything is well combined.
- Pour the mixture into an ice cream maker. Churn the mix according to your machine’s instructions until it reaches a soft-serve consistency.
- Transfer the ice cream to a lidded container and freeze for at least 4 hours or until firm.
- Serve and enjoy your rich, ultra-creamy chocolate ice cream!
how to serve Homemade Chocolate Ice Cream
To serve your chocolate ice cream, scoop it into bowls or cones. You can top it with chocolate sauce, whipped cream, or fresh berries for an extra touch. If you’re feeling adventurous, try adding some nuts or sprinkles for a fun crunch.
how to store Homemade Chocolate Ice Cream
Store your homemade chocolate ice cream in an airtight container in the freezer. It’s best to keep it in a simple, flat container to allow for easy scooping. This way, it will stay fresh for up to two weeks, although it may not last that long once everyone tastes it!
tips to make Homemade Chocolate Ice Cream
- Make sure your ice cream maker is chilled before you start. This helps the ice cream freeze faster for a smoother texture.
- If you want a more intense chocolate flavor, use more bittersweet chocolate.
- Let the ice cream sit at room temperature for a few minutes before scooping to soften it slightly.
variation
You can easily change this recipe by mixing in your favorite treats. Try adding crushed cookies, mint extract, or even peanut butter for different flavors.
FAQs
1. Can I use low-fat milk instead of whole milk?
While you can use low-fat milk, using whole milk creates a creamier texture.
2. Do I need an ice cream maker?
An ice cream maker gives the best results, but you can also place the mixture in a container and stir every 30 minutes until it’s frozen if you don’t have one.
3. How long will it take to churn in the ice cream maker?
Typically, it takes about 20-25 minutes to churn the ice cream to a soft-serve consistency, but this may vary by machine.
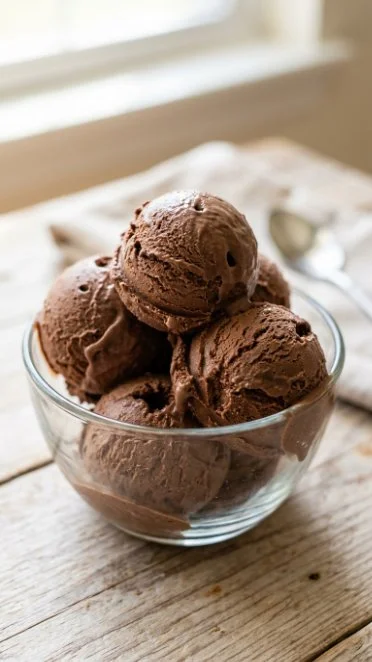
Homemade Chocolate Ice Cream
Ingredients
Method
- In a large bowl, whisk together the heavy cream, whole milk, sugar, cocoa powder, melted chocolate, vanilla extract, and salt until everything is well combined.
- Pour the mixture into an ice cream maker. Churn the mix according to your machine's instructions until it reaches a soft-serve consistency.
- Transfer the ice cream to a lidded container and freeze for at least 4 hours or until firm.
- Serve and enjoy your rich, ultra-creamy chocolate ice cream!