
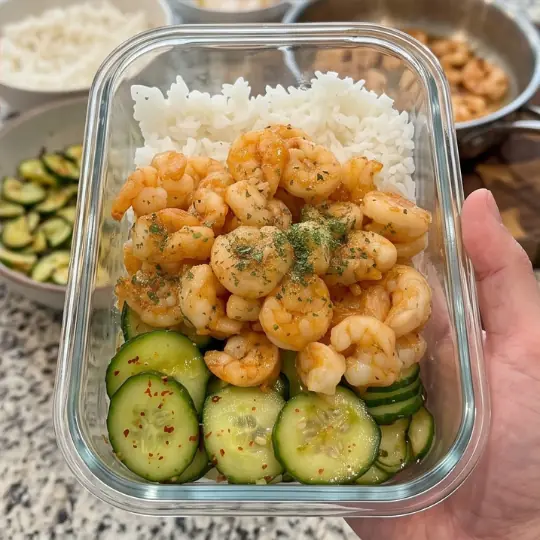
This honey butter shrimp bowl is proof that a quick, healthy meal doesn’t have to be boring. Juicy shrimp get coated in a light honey garlic glaze, served alongside fluffy rice and a refreshing, tangy cucumber salad. It’s sweet, savory, and satisfying, making it a great option for lunch, dinner, or easy meal prep.
Why You’ll Love This Recipe
- Sweet and savory in every bite. The honey butter glaze gives the shrimp a light, sticky sweetness balanced by garlic and butter.
- Ready in 20 minutes. A fast meal that doesn’t sacrifice flavor.
- Great for meal prep. Portioned as a single serving, this recipe is easy to multiply for the week ahead.
- Refreshing cucumber salad on the side. The tangy, sesame-forward salad balances the richness of the shrimp perfectly.
Ingredients
For the Honey Butter Shrimp
- 225 g raw shrimp, peeled and deveined
- 2 tsp minced garlic
- 15 g honey
- 15 g low fat butter
- ½ tbsp stevia
- 1 tsp garlic powder
- 1 tsp salt
- 1 tsp black pepper
For the Cucumber Salad
- 1 cucumber, sliced
- 1 tsp brown stevia
- 1 tsp garlic powder or minced garlic
- 5 ml sesame oil
- 5 ml soy sauce
- Pinch of gochugaru or chili powder
- Salt and black pepper, to taste
For Serving
- 125 g cooked rice
- Dried parsley flakes
How to Make Honey Butter Shrimp
1. Season the shrimp. In a bowl, toss the shrimp with salt, garlic powder, and black pepper until evenly coated.
2. Cook the shrimp. Heat a lightly greased skillet over medium-high heat. Cook the shrimp for 1 to 2 minutes per side until pink and cooked through. Remove from the pan and set aside.
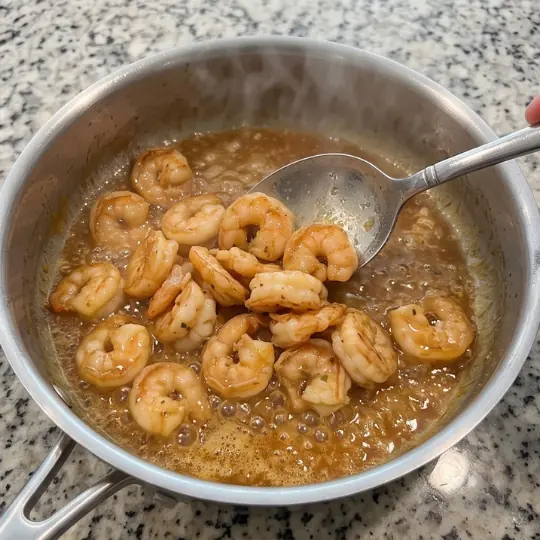
3. Make the honey butter sauce. In the same skillet, melt the butter. Add the minced garlic, honey, and stevia. Stir until the sauce becomes smooth and slightly sticky.
4. Coat the shrimp. Return the shrimp to the skillet and toss until every piece is coated in the honey butter sauce.
5. Prepare the cucumber salad. In a bowl, combine the cucumber, brown stevia, garlic powder or minced garlic, sesame oil, soy sauce, gochugaru, salt, and black pepper. Toss until evenly coated.
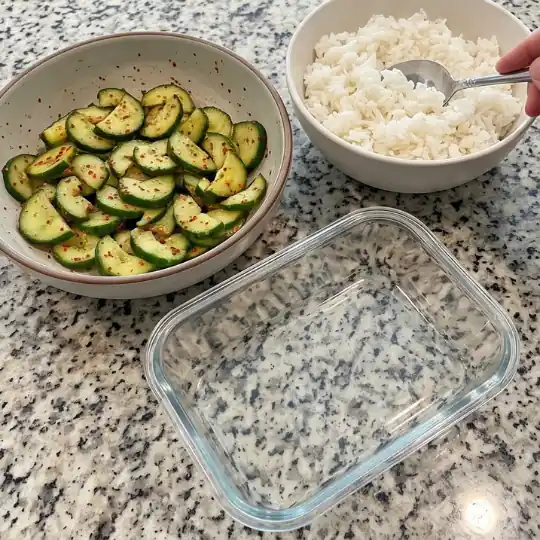
6. Assemble the bowl. Divide the cooked rice into serving bowls. Add the honey butter shrimp and cucumber salad alongside the rice.
7. Garnish and serve. Sprinkle with dried parsley flakes and serve immediately.
Tips for the Best Honey Butter Shrimp
- Don’t overcook the shrimp. One to two minutes per side is enough; they’ll turn rubbery if left too long in the pan.
- Let the sauce get sticky before adding the shrimp back in. This helps it cling nicely to each piece.
- Slice the cucumber thin and even so it absorbs the dressing well and stays crisp.
- Adjust the sweetness to taste. The stevia can be adjusted up or down depending on how sweet you like the glaze.
What to Serve with Honey Butter Shrimp
This bowl is designed to be a complete meal with rice and cucumber salad included, but it also pairs well with a simple steamed vegetable if you want to add more to the plate.
Frequently Asked Questions
Can I use regular sugar instead of stevia?
Yes, honey or brown sugar can be used in place of stevia if you prefer, adjusting to taste.
Can I use frozen shrimp?
Yes, just thaw completely and pat dry before cooking so they sear properly instead of releasing excess water.
Can I meal prep this for the week?
Yes, this recipe multiplies easily. Store the shrimp, rice, and cucumber salad separately in the refrigerator and combine when ready to eat.
Honey Butter Shrimp
Ingredients
Equipment
Method
- In a bowl, toss the shrimp with the salt, garlic powder, and black pepper until evenly coated.
- Heat a lightly greased skillet over medium-high heat. Cook the shrimp for 1 to 2 minutes per side, until pink and cooked through. Remove from the pan and set aside.
- In the same skillet, melt the butter. Add the minced garlic, honey, and stevia. Stir until the sauce becomes smooth and slightly sticky.
- Return the shrimp to the skillet and toss until every piece is evenly coated in the honey butter sauce.
- In a bowl, combine the sliced cucumber, brown stevia, garlic powder or minced garlic, sesame oil, soy sauce, gochugaru or chili powder, salt, and black pepper. Toss until evenly coated.
- Add the cooked rice to a serving bowl. Arrange the honey butter shrimp and cucumber salad alongside the rice.
- Sprinkle with dried parsley flakes and serve immediately.