
introduction
The moment you take a bite of these No-Bake Peanut Butter Cheerios Bars, the rich and creamy flavor of peanut butter wraps around your senses like a warm hug. I remember the first time I made these bars; it was a cozy afternoon with my kids, and the kitchen was filled with laughter and the sweet aroma of melting chocolate. These bars are more than just a quick snack—they’re a treasure trove of memories waiting to be created. You don’t need an oven to whip up a treat that the whole family will love. What sets this recipe apart is its simplicity and the ability to bring joy with every chewy, crunchy bite.
why make this recipe
Making No-Bake Peanut Butter Cheerios Bars is a fantastic way to enjoy a homemade snack without the fuss of baking. They are quick, easy, and require only a few ingredients. This recipe is perfect for busy weekdays or lazy weekends when you want something sweet but don’t have much time. Plus, your family can help with the process, making it a fun kitchen activity. These bars are not only delicious but also a healthier option compared to many store-bought snacks.
how to make No-Bake Peanut Butter Cheerios Bars
Ingredients :
- 1/2 cup creamy peanut butter
- 1/2 cup honey
- 3 cups Cheerios™ cereal
- 1/2 cup dark chocolate chips
Directions :
- Line an 8×8 baking dish with parchment paper and set aside.
- In a microwave-safe bowl, combine the peanut butter and honey.
- Heat in 30-second increments, stirring each time until melted and easy to combine.
- In a large bowl, stir together the peanut butter mixture and Cheerios™.
- Add the chocolate chips and stir again to combine.
- Pour the mixture into the prepared baking dish and place in the fridge to set for 30 minutes to an hour.
- Cut into 9 squares (or 16 smaller squares) and enjoy!
how to serve No-Bake Peanut Butter Cheerios Bars
These bars are perfect for a quick snack or a sweet treat after a meal. Serve them on a plate at a family gathering, pack them in lunchboxes, or simply enjoy them while relaxing at home. Pair them with a glass of milk or your favorite smoothie for an extra delicious experience.
how to store No-Bake Peanut Butter Cheerios Bars
To store these bars, keep them in an airtight container in the fridge. They will stay fresh for up to a week. If you want to store them for longer, consider freezing them. Just wrap each bar in parchment paper and place them in a freezer bag. They can last for up to three months in the freezer.
tips to make No-Bake Peanut Butter Cheerios Bars
- Make sure to use creamy peanut butter for a smoother texture.
- Customize the bars by mixing in your favorite nuts or dried fruits.
- If you prefer a less sweet treat, use less honey or dark chocolate.
- To make the bars even easier to cut, let them chill longer in the fridge until they are firm.
variation
If you want to switch things up, you can try using crunchy peanut butter for extra texture. Adding a sprinkle of salt on top can enhance the flavor too! For a twist, try substituting Cheerios™ with another type of cereal like Rice Krispies or granola.
FAQs
Can I use natural peanut butter?
Yes, you can use natural peanut butter, but it may not hold together as well as creamy peanut butter. You might need to adjust the honey amount for the right consistency.
How can I make these bars vegan?
To make these bars vegan, use maple syrup instead of honey and ensure your chocolate chips are dairy-free.
Can I make these bars ahead of time?
Absolutely! You can make these bars up to a week in advance, which is great for meal prep or for keeping handy for snacks.
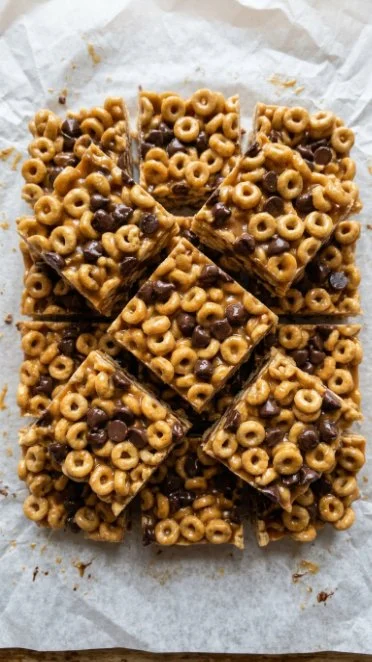
No-Bake Peanut Butter Cheerios Bars
Ingredients
Method
- Line an 8x8 baking dish with parchment paper and set aside.
- In a microwave-safe bowl, combine the peanut butter and honey.
- Heat in 30-second increments, stirring each time until melted and easy to combine.
- In a large bowl, stir together the peanut butter mixture and Cheerios™.
- Add the chocolate chips and stir again to combine.
- Pour the mixture into the prepared baking dish and place in the fridge to set for 30 minutes to an hour.
- Cut into 9 squares (or 16 smaller squares) and enjoy!