
You know those days when you just crave something sweet, but you also want it to be healthy? That’s exactly how I felt when I first tried making Chocolate Cherry Date Balls. I remember sitting in my kitchen, the rich smell of cocoa wafting through the air, and feeling an instant lift in my mood. This recipe matters to me because it offers a guilt-free way to indulge my sweet tooth while packing in nutritious ingredients. The combination of dates and cherries creates a delightful burst of flavor, making these treats both delicious and satisfying. What makes this recipe truly special is how simple and quick it is, perfect for any occasion.
why make this recipe
Making Chocolate Cherry Date Balls is a great choice for anyone looking for a healthy snack or dessert option. They are naturally sweet thanks to the dates and dried cherries, meaning you won’t need any added sugars. These energy balls are also loaded with nutrients from nuts and cocoa powder, giving you a boost whenever you need it. Plus, they are easy to customize and can be made in batches, perfect for meal prep or sharing with friends.
how to make Chocolate Cherry Date Balls
Ingredients
- 1 cup Medjool dates, pitted
- 1 cup dried cherries
- 1/2 cup unsweetened cocoa powder
- 1 cup nuts (walnuts or almonds)
- 1/4 teaspoon salt
- 1 teaspoon vanilla extract
- Shredded coconut (optional for coating)
Directions
- In a food processor, combine the pitted dates, dried cherries, nuts, cocoa powder, salt, and vanilla extract.
- Pulse until the mixture is well combined and sticky.
- If the mixture is too dry, add a little water or more dates.
- Roll the mixture into small balls (about 1 inch in diameter).
- If desired, roll the balls in shredded coconut to coat.
- Place the balls on a plate and refrigerate for at least 30 minutes before serving.
how to serve Chocolate Cherry Date Balls
You can serve Chocolate Cherry Date Balls as a quick snack or a sweet treat after a meal. They are great for parties or casual gatherings. Just arrange them on a platter or in a bowl, and allow everyone to help themselves. They also make wonderful gifts, especially when packaged in a pretty box.
how to store Chocolate Cherry Date Balls
To keep your Chocolate Cherry Date Balls fresh, store them in an airtight container in the refrigerator. They can last for up to two weeks. If you want to keep them longer, you can freeze them in a freezer-safe container. Just let them thaw in the fridge overnight before enjoying them again.
tips to make Chocolate Cherry Date Balls
- Make sure your dates are soft to help everything blend well.
- Experiment with different nuts to find your favorite flavor.
- If you prefer a sweeter taste, add a bit of honey or maple syrup before blending.
- For a fun twist, try adding a pinch of cinnamon or a few chocolate chips to the mixture.
variation
You can mix things up by adding ingredients like chia seeds, flaxseeds, or peanut butter for added flavor and nutrition. If you like coconut, you might consider adding some shredded coconut directly into the mixture instead of just using it for coating.
FAQs
1. Can I use fresh cherries instead of dried ones?
Fresh cherries have a high moisture content and may not work as well in this recipe. Dried cherries provide the right texture and sweetness.
2. Are there any nut-free options?
Yes! You can substitute the nuts with seeds like sunflower or pumpkin seeds to keep it nut-free.
3. Can I make these without a food processor?
If you don’t have a food processor, you can try chopping the ingredients finely by hand and mixing them in a bowl, although it may take more time and effort.
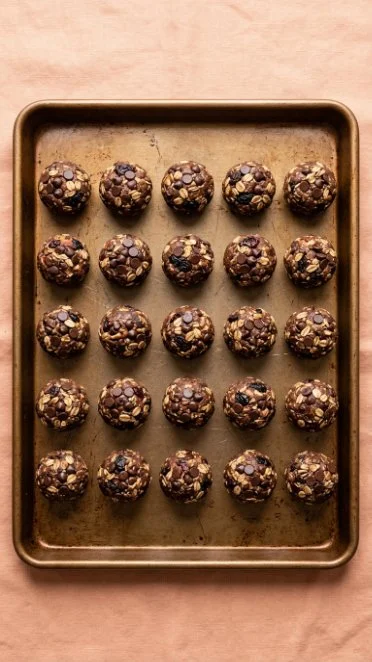
Chocolate Cherry Date Balls
Ingredients
Method
- In a food processor, combine the pitted dates, dried cherries, nuts, cocoa powder, salt, and vanilla extract.
- Pulse until the mixture is well combined and sticky.
- If the mixture is too dry, add a little water or more dates.
- Roll the mixture into small balls (about 1 inch in diameter).
- If desired, roll the balls in shredded coconut to coat.
- Place the balls on a plate and refrigerate for at least 30 minutes before serving.