
Warm, Personal Introduction
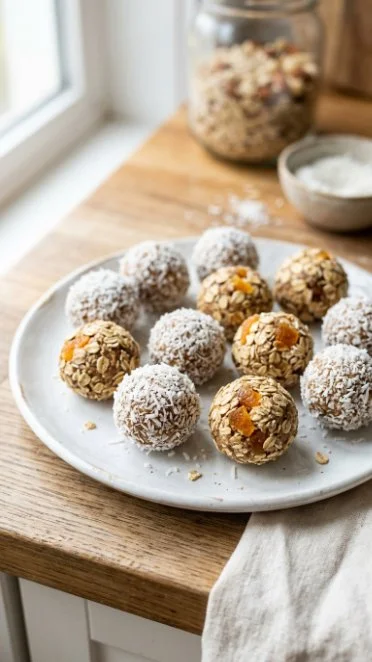
When I first tried making energy balls, I was looking for a quick snack that wasn’t just tasty but also packed with nutrients. I remember the sweet and nutty aroma that filled my kitchen as I blended the ingredients together. It felt like I was creating something special and wholesome, without needing to bake for hours. This recipe for Chewy Apricot Energy Balls has a special place in my heart because it combines easy-to-find ingredients with the vibrant sweetness of apricots. You can whip them up in no time, making them perfect for busy days or when you need a healthy pick-me-up. I love how these little bites not only satisfy my cravings but also bring a touch of joy to each day.
Why Make This Recipe
These Chewy Apricot Energy Balls are a fantastic choice for several reasons. First, they are incredibly easy to make and perfect for any skill level in the kitchen. Second, they offer a great mix of flavors and textures, making them both chewy and satisfying. Not to mention, they are packed with healthy ingredients that provide you with energy without any guilt. Whether you’re preparing for a workout, need a quick snack for your kids, or simply want a nutritious treat for yourself, these energy balls are the way to go.
How to Make Chewy Apricot Energy Balls
Ingredients:
- 1 cup dried apricots (soft and plump)
- 1 cup rolled oats (old-fashioned)
- 1/2 cup raw almonds
- 1 tbsp chia seeds
- 1/4 cup unsweetened shredded coconut (plus extra for rolling, optional)
- 1 tbsp pure maple syrup (optional, only if needed)
- 1/2 tsp vanilla extract
- 1/4 tsp ground cinnamon
- 1 pinch fine sea salt
- 1-2 tsp water (only if needed for consistency)
Directions:
- Add the almonds and rolled oats to a food processor. Pulse until you get a coarse meal, but don’t blend it to a fine flour.
- Next, add the dried apricots, chia seeds, shredded coconut, vanilla, cinnamon, and salt. Process this mixture until it starts to clump and looks sticky.
- Pinch some of the mixture between your fingers. If it holds together, it’s ready. If it feels crumbly, drizzle in the maple syrup or 1-2 teaspoons of water and pulse again.
- Scoop about 1 tablespoon at a time from the mixture and roll it into balls between your palms. If you want, roll each ball in extra coconut.
- Chill the balls in the fridge for about 15 minutes to help them firm up. This recipe makes about 14 energy balls.
How to Serve Chewy Apricot Energy Balls
These energy balls are versatile and can be enjoyed at any time of the day. Serve them as a quick breakfast on the go, a mid-morning snack, or a healthy dessert after lunch. They are also perfect for packing in lunchboxes for kids or as fuel during outdoor adventures.
How to Store Chewy Apricot Energy Balls
After making these energy balls, you can store them in an airtight container in the fridge. They stay fresh for about a week, making them a great snack to have on hand. For longer storage, you can freeze them for up to three months. Just let them thaw in the fridge before enjoying them again.
Tips to Make Chewy Apricot Energy Balls
- Use moist and soft dried apricots for the best texture.
- Adjust the sweetness by adding maple syrup if you prefer a sweeter bite.
- Feel free to add in seeds, nuts, or spices to customize the flavor according to your taste.
- Rolling the balls in shredded coconut not only adds flavor but also makes them look delightful.
Variation
You can easily switch up the recipe by substituting the dried apricots with other dried fruits like dates or figs for different flavors. You can also use peanut butter instead of almonds if you want a nut butter flavor.
FAQs
1. Can I use other types of nuts?
Yes, you can substitute almonds with any nuts you like, such as cashews or walnuts.
2. Are these energy balls gluten-free?
Yes, as long as you use certified gluten-free oats, these energy balls are gluten-free.
3. What if I don’t have a food processor?
If you don’t have a food processor, you can chop the ingredients by hand and mix them in a bowl. It will take a bit more effort, but it’s definitely doable!